

Key Takeaways
- Daily cleaning takes 2 minutes and one damp cloth. Wipe the mixer body, wash the bowl and attachments in warm soapy water, dry everything completely. That's it. You don't need specialty cleaners or a 12-step ritual.
- Aluminum attachments turn grey and leave residue on your hands if they go through the dishwasher. This is the #1 stand mixer cleaning mistake on Reddit. Coated beaters peel. Stainless steel attachments are the only ones rated for the dishwasher without degrading.
- Grease leaking from the mixer head is either totally normal (a few drops of separated oil from an infrequently used mixer) or a real problem (thick, dark grease with a burnt smell). The difference matters.
- A stand mixer needs a gearbox re-grease roughly every 3 to 5 years with regular use — or sooner if it gets louder, runs hotter, or drips dark grease. The job takes 45 minutes, a screwdriver, and $15 worth of food-grade grease.
- Hauswirt stand mixer attachments are stainless steel and dishwasher-safe, unlike KitchenAid's standard aluminum whisk, coated flat beater, and uncoated dough hook — all of which require hand washing to avoid oxidation and peeling.
You just made a batch of chocolate chip cookies. The stand mixer did its job. The bowl is coated in butter and sugar residue, the dough hook has sticky bits in every crevice, and there's a light dusting of flour on the mixer head.
You're tired. You want to leave it until tomorrow. And that's fine — for one night. But over months and years, the way you clean (or don't clean) your stand mixer is the single biggest factor in whether it lasts 5 years or 25.
This guide covers every cleaning task a stand mixer owner actually needs to do, from the 2-minute daily wipe-down to the 45-minute annual re-grease — plus the dishwasher rules most people learn the hard way.
The 3-Tier Stand Mixer Cleaning Schedule
You don't need to deep-clean everything every time you bake. Here's the actual maintenance rhythm that keeps a mixer running for decades, broken into three tiers by frequency and effort.
After every use: The 2-minute daily clean
Remove the bowl and attachment. Wash both in warm, soapy water, rinse, and dry with a clean towel. Wipe the mixer body with a damp cloth — flour dust, sugar spray, and oil mist from creaming butter settle on the motor housing and turn into a sticky film if you leave them. Pay special attention to the tilt-head hinge area and the attachment hub: these are where gunk accumulates fastest and where most people forget to look.
Do not submerge the mixer head in water. Do not spray it with all-purpose cleaner and hope for the best. A damp microfiber cloth is all you need for the motor housing. So: if you're the type of baker who wipes down the counter and calls it done — add one more wipe to the mixer body and you're covered. (For a full break-down of mixer parts and what they do, see our stand mixer attachments guide.)
Once a month: The 15-minute deep surface clean
The daily wipe-down keeps things presentable, but once a month, go a level deeper:
- Soak the attachments in warm, soapy water for 10 minutes. Use a soft-bristle brush (an old toothbrush works) to scrub the crevices where the dough hook shaft meets the spiral, and the wire intersections on the whisk. Dried dough hides there.
- Clean under the tilt-head — tilt the head back and wipe the underside of the motor housing. Flour drifts up there during mixing and can work its way into the hinge.
- Remove and wash the power hub cover — the small metal disc on the front of the mixer head covers the attachment port. Pop it off (most models: twist counterclockwise), wash it, and wipe inside the port where grease from attachments can transfer.
- Check the bowl-lift arms or tilt-head hinge for sticky residue that might affect the mechanism's smoothness.
- Wipe the cord — it drags across the counter, picks up every spill, and is the most neglected surface on the machine.
Once a year: The 45-minute gearbox re-grease
Inside the mixer head, the motor drives a set of metal gears through a thick layer of food-grade grease. Over time, that grease degrades. It separates into oil and soap. It dries out. It migrates away from the gear teeth. This is what makes an older mixer louder, hotter, and less efficient — the same symptoms we cover in our stand mixer noise guide.
Re-greasing is a DIY job for anyone comfortable with a screwdriver. The process: remove the top cover, scoop out the old grease with a plastic spatula, clean the gear surfaces, pack in fresh food-grade synthetic grease (a 4-ounce tub runs about $15), and reassemble. Mr. Mixer on TikTok has step-by-step videos for every KitchenAid model. KitchenAid's official recommendation is every 3-5 years for regular home use, or sooner if you notice increased noise, heat, or dark grease seeping from the seams.
How to Clean Each Part of a Stand Mixer
The mixing bowl — stainless steel vs glass
Stainless steel bowls go in the dishwasher, but they'll stay shinier longer if you hand wash and dry them with a microfiber cloth — dishwasher detergent is slightly abrasive and will dull the polish over time. Glass bowls are dishwasher-safe but heavier and more prone to chips at the rim. Thermal shock is the enemy: never pour boiling water into a cold glass bowl or vice versa.
For stuck-on residue — burnt sugar, dried bread dough, hardened batter — fill the bowl with warm water and a drop of dish soap and let it sit for 30 minutes. The residue will soften and release without scrubbing. Scouring pads will scratch both stainless and glass.
The flat beater, dough hook, and whisk
This is where the most important cleaning rule lives, and it's the one most new owners break within the first month. The material of your attachment determines whether it can survive the dishwasher.
Aluminum attachments (KitchenAid's standard uncoated dough hook and wire whisk): hand wash only. The dishwasher's high heat and caustic detergent will oxidize the aluminum within 2-3 cycles. The surface turns dull grey, then dark grey, and eventually leaves a black residue on your fingers every time you handle it. This is not dirt. It's aluminum oxide. There is no fix except replacing the attachment.
Coated attachments (KitchenAid's standard white-coated flat beater): hand wash only, and gently. The polyester coating resists sticky dough, but abrasive scrubbers — steel wool, Scotch-Brite pads, even the rough side of a sponge — will scratch the coating. Once the coating is compromised, water gets underneath and it starts peeling in sheets. A soft dish brush or a sponge's soft side only.
Stainless steel attachments (Hauswirt M5 and M5max, some aftermarket KitchenAid replacements): dishwasher-safe. Stainless steel is non-reactive, won't oxidize, and won't peel. If you're buying aftermarket attachments for a KitchenAid, the stainless versions cost $15–25 more per piece and eliminate the hand-wash requirement entirely. For a daily baker, that convenience trade-off pays for itself within a month.

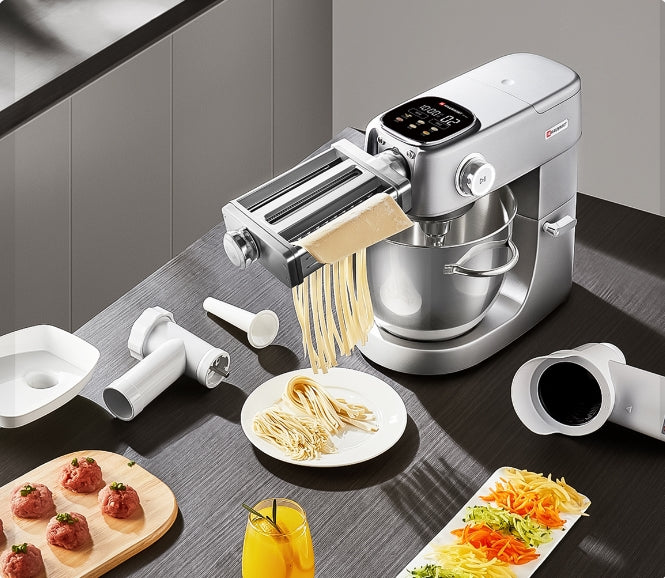
Hauswirt M5 Max 6QT Stand Mixer for Effortless Home Baking
500W DC Motor | 6QT Bowl | 45dB Quiet | 4.5" Touchscreen
The mixer head and body
Never submerge the mixer head or run water directly over it. The motor, gearbox, and electrical connections are inside. Use a damp (not wet) microfiber cloth and wipe gently. For greasy film around the tilt-head hinge, a drop of mild dish soap on the cloth, not sprayed directly on the machine. Dry immediately.
The vent slats on the motor housing will accumulate flour dust. Use a dry pastry brush or the brush attachment on a vacuum to clean them — compressed air works too, but it blows the dust deeper into the housing if you're not careful.
The attachment hub and power hub cover
The front attachment port — where a meat grinder, pasta roller, or food processor connects — is a magnet for grime. Even if you never use attachments, flour and oil mist drift in. Pop off the hub cover, wipe the port interior with a damp paper towel, and dry it. If an attachment has been connected for a while, check for transferred grease inside the port.
Dishwasher vs Hand Wash: A Quick Reference
| Part | Material | Dishwasher? | Why |
|---|---|---|---|
| Stainless steel bowl | Stainless steel | Yes | May dull polish over time |
| Glass bowl | Glass | Yes | Avoid thermal shock |
| Stainless steel flat beater | Stainless steel | Yes (safe) | Non-reactive; won't oxidize |
| Stainless steel dough hook | Stainless steel | Yes (safe) | Non-reactive; won't oxidize |
| Stainless steel whisk | Stainless steel | Yes (safe) | Non-reactive; won't oxidize |
| Uncoated aluminum dough hook | Aluminum | No | Oxidizes → grey, leaves residue |
| Aluminum wire whisk | Aluminum | No | Same oxidation problem |
| White-coated flat beater | Coated metal | No | Coating peels; abrasive damage |
| Pour shield / splash guard | Plastic | Top rack only | Heat warps on bottom rack |
| Mixer body / motor head | Metal + electronics | Never | Motor, gearbox, wiring inside |
Cleaning Specific Attachments
Pasta roller and cutter
Never submerge a pasta roller in water. The internal gears will trap moisture and rust. After each use, let any stuck dough dry completely — it will flake off with a dry pastry brush or a wooden skewer. Wipe the rollers with a barely-damp cloth, then immediately with a dry one. Do not oil the rollers: oil goes rancid and transfers to your next batch of pasta. For a complete breakdown of pasta attachment care, read our stand mixer pasta attachment guide.
Meat grinder
The meat grinder is the attachment most likely to cause food-safety problems if cleaned poorly. Disassemble completely — plate, blade, auger, feed tube, hopper — and wash all parts in hot, soapy water immediately after use. Run the parts through your fingers; any grit or residue means wash again. Dry thoroughly before reassembly. A speck of moisture left between the blade and plate overnight will produce rust. For a complete overview of grinder operation and maintenance, see our stand mixer meat grinder guide.
Splash guard and pour shield
The plastic pour shield that clips onto the bowl rim catches flour clouds and prevents ingredient ejection — but the rim groove where it snaps onto the bowl traps batter. Pop it off after each use and run your fingernail or a dish brush through the groove. If it goes in the dishwasher, put it on the top rack only; bottom-rack heat will warp the plastic.
Grease Leaking from the Mixer — What It Means
Normal: a few drops of separated oil
Stand mixer gear grease is a mixture of oil and soap thickener. When a mixer sits unused for weeks or months, the oil can separate from the thickener and weep out of the gearbox seams as a thin, amber-colored liquid — usually from the seam around the planetary (the disc the attachments connect to). If you see a few drops of light-colored oil, especially after a period of disuse, this is normal. Wipe it away. It is not a sign of failure.
Problem: thick, dark grease or continuous leakage
If the grease coming out is thick, dark grey or black, smells burnt, or drips onto your dough during mixing, the gearbox needs attention. This means the grease has broken down — it's been overheated, contaminated, or is simply past its service life. Continuing to run the mixer in this state accelerates gear wear. The fix is the re-grease described in the annual maintenance section above.
5 Cleaning Mistakes That Ruin Stand Mixers
- Putting aluminum attachments in the dishwasher. This is by far the most common stand mixer cleaning mistake, and the results are permanent. The aluminum oxidizes, the surface turns grey, and a black residue transfers to your hands and your dough. There is no way to reverse aluminum oxidation on a kitchen attachment short of media blasting, which costs more than a new attachment.
- Submerging the mixer head or pouring water directly on it. Water runs into the motor vents, the gearbox seals, and the speed control board. Best case: the mixer just stops working. Worst case: it shorts and creates a shock hazard. If water gets inside — say, you spilled a full cup of milk over the mixer head — unplug it immediately, tilt the head all the way back, and let it dry for at least 48 hours before plugging it in.
- Using abrasive scrubbers on coated beaters. The white-coated flat beater that comes with most KitchenAids has a thin polyester layer that resists dough adhesion. Scotch-Brite pads and steel wool destroy that layer. Once the coating is scratched, dishwater penetrates underneath and peels it off in sheets.
- Using bleach, ammonia, or oven cleaner. Bleach corrodes stainless steel (despite what you'd expect), ammonia damages aluminum, and oven cleaner will strip paint off the mixer body. The strongest cleaner you should ever use on a stand mixer is a few drops of mild dish soap in warm water.
- Storing attachments while they're still damp. Stacking wet attachments in a drawer, especially aluminum ones, creates the perfect environment for oxidation and, eventually, rust on the steel connection hubs. Every attachment needs to be bone dry before it goes into storage.
What to Look for in an Easy-to-Clean Stand Mixer
If you haven't bought yet and you know you'll dread cleaning — or you bake daily and can't afford a 10-minute cleanup every time — here's what makes one mixer easier to live with than another.
Stainless steel attachments. This is the single biggest variable. Hauswirt includes stainless steel attachments on the M5 and M5max as standard. KitchenAid's standard attachments are coated (flat beater) and uncoated aluminum (dough hook, whisk) — hand wash only. You can buy stainless aftermarket replacements for KitchenAid at $15–25 per attachment, which pushes the total cost up. If you bake frequently, a mixer that comes with dishwasher-safe attachments out of the box saves you real time every single day.
Tilt-head vs bowl-lift for cleaning access. Tilt-head mixers give you unobstructed access to the underside of the motor housing and the attachment hub for wiping down, which makes the monthly deep surface clean faster. Bowl-lift mixers have more crevices around the lift arms and cradle. If easy cleaning is a priority, tilt-head wins. Our tilt-head vs bowl-lift comparison covers all the other trade-offs.
Smooth, sealed motor housing. Avoid mixers with decorative grooves, unnecessary seams, or textured finishes on the motor head — those are places flour dust settles and stays. A smooth, sealed housing wipes clean in one pass with a damp cloth.
Related Reading
This article is part of our Stand Mixer Maintenance Guide — daily, monthly, and yearly care to keep your mixer running for 15 years.
Frequently Asked Questions
Can you put a stand mixer bowl in the dishwasher?
Stainless steel and glass stand mixer bowls are dishwasher-safe. The bowl will get clean, but over dozens of cycles, dishwasher detergent — which is slightly abrasive — will gradually dull the polished finish on a stainless bowl. If you want the bowl to stay shiny, a 30-second hand wash with a soft sponge is gentler. Never put a bowl with a thermal jacket or integrated handles with mechanical components in the dishwasher unless the manufacturer explicitly says it's rated for it.
How do you clean a stand mixer without taking it apart?
For daily cleaning, you don't take anything apart. Remove the bowl and attachment, wash them by hand or in the dishwasher (depending on material — see the dishwasher chart above), and wipe the mixer body, tilt-head hinge area, and attachment hub with a damp microfiber cloth. Dry with a clean towel. The only cleaning task that requires disassembly is an annual gearbox re-grease, which involves removing the top cover with a screwdriver.
Are KitchenAid attachments dishwasher safe?
Most standard KitchenAid attachments are not dishwasher safe. The uncoated aluminum dough hook and wire whisk will oxidize to a dull grey in the dishwasher and leave black residue on your hands. The white-coated flat beater is hand-wash only because abrasive dishwasher detergent can scratch the polyester coating. Only KitchenAid's stainless steel accessory line is rated dishwasher-safe — and those are sold separately, not included with the mixer.
How do you deep clean a stand mixer?
A deep clean means cleaning beyond the bowl and attachments. Once a month, tilt the mixer head all the way back and wipe the underside of the motor housing, the hinge mechanism, and the attachment hub port. Soak attachments in warm soapy water for 10 minutes and scrub the crevices where dried dough hides with a soft brush. Remove the power hub cover, wash it, and wipe inside the port. The 15-minute process catches everything the daily wipe-down misses.
Why is grease coming out of my stand mixer?
A few drops of thin, amber-colored oil seeping from the seam around the planetary disc or the gearbox cover is normal — this is oil that has separated from the gear grease, especially common on mixers used infrequently. Wipe it away. If the grease is thick, dark grey or black, smells burnt, or is dripping continuously, the gearbox grease has broken down and needs to be replaced. Run the mixer at low speed for 30 seconds and check again; if grease keeps leaking, schedule a re-grease.
How often should you re-grease a stand mixer?
For a mixer used 2–3 times per week, re-grease every 3 to 5 years. Heavy daily bakers should do it every 2 to 3 years. Signs that re-greasing is overdue: the mixer is noticeably louder than when it was new, it runs hot after one batch of bread dough, or dark grease is seeping from the gearbox seams. KitchenAid's official guidance is every 3-5 years for normal home use.
How do you get dried dough off a dough hook?
Fill the mixing bowl with warm water and a few drops of dish soap. Drop the dough hook in and let it soak for 20–30 minutes. The dried dough will soften and release — a soft brush or your fingernail will handle whatever is left in the crevices. Do not use boiling water (it sets gluten and makes the dough stick harder) or metal tools to scrape (they scratch the attachment). For stainless steel dough hooks, a 30-minute soak is always enough.
Can you clean a stand mixer with vinegar?
Diluted white vinegar (1 part vinegar to 3 parts water) is safe for cleaning stainless steel bowls and attachments to remove hard water spots or mineral deposits. Rinse thoroughly and dry immediately — vinegar is acidic and will corrode metal if left on the surface. Do not use vinegar on aluminum attachments (it accelerates oxidation), on coated beaters (it can dull the coating), or anywhere near the gearbox seals or electrical components.
The Bottom Line
Cleaning a stand mixer is not complicated. It is a 2-minute job after every use and a 15-minute job once a month. The only hard part — the annual re-grease — is optional for the first 3-5 years and takes less than an hour with a screwdriver.
The two rules that prevent 90% of stand mixer damage: know what your attachments are made of before they touch the dishwasher, and never let water near the motor housing. Everything else is just consistency. If you're in the market for a new mixer and cleaning effort is a factor, look at what the attachments are made of — stainless steel means a 30-second dishwasher load instead of a 5-minute hand wash after every bake. Over a decade of weekly baking, that's roughly 40 hours of your life you get back.
Sources
- KitchenAid, official care and cleaning instructions — material-specific guidance for coated flat beaters, uncoated aluminum dough hooks and whisks, and stainless steel bowls.
- Mr. Mixer TikTok channel (@mr..mixer, 500K+ followers) — gearbox re-grease demonstrations across every KitchenAid model, showing the before-and-after difference in noise and performance.
- Baking-Forums thread "Troubleshooting a Noisy KitchenAid Mixer" (2020) — long-running discussion on re-greasing techniques, synthetic vs mineral food-grade grease, and Loctite screw tightening.
- Reddit r/Kitchenaid and r/Baking — dozens of owner-reported incidents of dishwasher-damaged aluminum attachments, grease-leakage questions, and cleaning technique discussions.
- iFixit, KitchenAid KSM150 Troubleshooting — gearbox disassembly documentation, worm gear replacement, and re-greasing procedure for the most common home mixer model.
- Hauswirt M5 and M5max product specifications — stainless steel attachment composition, dishwasher-safe rating, and sealed gearbox design.

