Stand Mixer Pasta Attachment: Roller vs Press vs Extruder — Which One Should You Buy?
Title Tag: Stand Mixer Pasta Attachment: Roller vs Press vs Extruder — Which to Buy
Meta Description: Not sure which stand mixer pasta attachment to buy? This guide compares roller, press, and extruder types — what each does, which pasta shapes you can make, and which one fits your cooking style.
URL Slug: /blogs/product-guides/stand-mixer-pasta-attachment-roller-press-extruder
Blog Category: Product Guides (ID: 96381927517)
Author: Ethan Brooks
Tags: Stand Mixer Pasta Press, Pasta Attachment, Stand Mixer Attachments, Homemade Pasta, Pasta Roller, Pasta Extruder
Key Takeaways
- A stand mixer pasta roller flattens and cuts sheet-style pasta like fettuccine, tagliatelle, and lasagna — it's the most versatile and beginner-friendly attachment type.
- A stand mixer pasta press (also called an extruder) pushes dough through shaped dies to make tubular and shaped pasta like macaroni, bucatini, and rigatoni — something a roller cannot do.
- The roller attachment costs between $80–$150 and handles 90% of what most home cooks want from fresh pasta; the press/extruder costs $100–$200 and is worth it only if you specifically want shaped pasta.
- Cleaning difficulty is the biggest difference: rollers wipe clean in seconds, while extruders require disassembly and a drying brush (see our full cleaning guide for attachment-specific techniques) — plan your purchase around how much cleanup you're willing to do.
- Not all pasta attachments fit all mixers — hub size, drive type, and bowl clearance vary between KitchenAid, Hauswirt, Cuisinart, and Bosch, so check compatibility before buying.
You've seen the videos. Someone feeds a ball of dough into their stand mixer, and out comes a ribbon of fresh fettuccine. It looks effortless. Then you search for a stand mixer pasta press and find three completely different types of attachments — rollers, presses, extruders — and no clear explanation of which one does what.
That confusion is common. Most buying guides lump all pasta attachments together or focus exclusively on KitchenAid products. But the type you choose determines what shapes you can make, how much effort it takes, and whether the attachment ends up gathering dust or earning its spot on your counter.
This guide breaks down each type — pasta roller, pasta press, and pasta extruder — with side-by-side comparisons, quick recipes, and a clear decision framework so you buy the right one the first time.
What's the Difference Between a Pasta Roller, Pasta Press, and Pasta Extruder?
These three terms get mixed up constantly, including by manufacturers. Here's what each one actually means:
A pasta roller is a pair of adjustable steel cylinders that flatten dough into sheets and then cut those sheets into long, flat noodles. You control the thickness by adjusting the roller gap. It's the attachment most people picture when they think of making pasta with a stand mixer.
A pasta press (also marketed as a pasta extruder) is a hub-mounted attachment that forces dough through a removable metal die with shaped holes. The die determines the pasta shape — each die produces one specific shape, like macaroni or rigatoni. KitchenAid sells this as the "Pasta Press Attachment" (model KPEXTA), while Marcato and other makers call similar devices extruders.
A pasta extruder is functionally the same thing as a pasta press — the terms are used interchangeably in the stand mixer world. "Extruder" is the technical term for the process of pushing material through a shaped opening. If a product is called an "extruder" rather than a "press," it's the same mechanism, possibly with a different set of dies included.
| Pasta Roller | Pasta Press / Extruder | |
|---|---|---|
| How it works | Flattens dough into sheets, then cuts sheets into noodles | Forces dough through shaped dies to create specific pasta shapes |
| Pasta shapes | Flat and ribbon types: lasagna, fettuccine, spaghetti, tagliatelle, pappardelle | Tubular and shaped types: macaroni, bucatini, rigatoni, fusilli, cavatappi |
| Price range | $80–$150 | $100–$200 |
| Learning curve | Low — intuitive rolling and cutting | Medium — dough moisture must be precise |
| Cleaning | Easy — wipe with dry cloth or brush | Hard — disassembly required, dies need soaking |
| Best for | Beginners, frequent pasta makers, flat noodle lovers | Experienced cooks who want shaped pasta like macaroni |
Pasta Roller Attachment: The Versatile Classic

If you're buying just one pasta attachment, make it a roller. It handles the pasta shapes most people cook at home — fettuccine, tagliatelle, lasagna sheets, spaghetti — and the learning curve is forgiving enough that your first batch will be edible.
How a Pasta Roller Works
A pasta roller attaches to the front hub of your stand mixer (on KitchenAid models) or clamps to the mixer head (on some other brands). It has two stainless steel rollers with an adjustable gap. You start at the widest setting (usually setting 0 or 1), feed a flattened piece of dough through, then gradually narrow the gap and re-roll until you reach your desired thickness. Most rollers offer 8–10 thickness settings.
Once you have a thin sheet, you either use it as-is for lasagna or ravioli, or run it through the attached cutter — a second set of notched rollers that slices the sheet into specific widths. Most roller sets include two cutters: one for fettuccine (about 6.5mm wide) and one for spaghetti (about 1.5mm wide).
What Shapes You Can Make with a Roller
- Lasagna sheets — just the rolled sheet, no cutting needed
- Fettuccine — wide ribbon, the most common cutter included
- Spaghetti — thin round noodle, included with most cutter sets
- Tagliatelle — slightly narrower than fettuccine, similar cutter
- Pappardelle — cut the sheet by hand into wide ribbons (about 2.5cm)
- Ravioli — roll the sheet thin, add filling, fold and seal
- Linguine — some cutter sets include a linguine die (about 3mm wide)
The key limitation: a roller cannot make any tubular or shaped pasta. No macaroni, no rigatoni, no fusilli. If you want those shapes, you need a press/extruder.
Quick Recipe: Fresh Fettuccine in 20 Minutes
Ingredients:
- 2 cups (250g) all-purpose flour or 00 flour
- 3 large eggs
- 1/2 tsp salt
- 1 tbsp olive oil
Steps:
- Attach the flat beater to your stand mixer. Add flour and salt to the bowl. Mix on speed 2 for 30 seconds.
- Add eggs and olive oil. Mix on speed 2 until the dough starts to come together in clumps (about 1 minute). If the dough is too dry, add water 1 tsp at a time. If too sticky, add flour 1 tbsp at a time.
- Switch to the dough hook. Knead on speed 2 for 3–4 minutes until the dough is smooth and elastic. It should feel like firm Play-Doh — not sticky, not crumbly.
- Wrap the dough in plastic and let it rest at room temperature for 15–30 minutes. This relaxes the gluten and makes rolling much easier.
- Cut the dough into 4 equal pieces. Flatten each into a rough oval about 1cm thick.
- Attach the pasta roller. Set to the widest setting (0 or 1). Feed one piece through. Fold in thirds like a letter, flatten slightly, and feed through again on the same setting. Repeat once more.
- Gradually reduce the thickness setting, feeding the sheet through each level once. Stop at setting 4 or 5 for fettuccine.
- Switch to the fettuccine cutter. Feed each sheet through. Toss the cut noodles with a little flour to prevent sticking.
- Cook in boiling salted water for 2–3 minutes. Fresh pasta cooks much faster than dried.
Makes about 1 pound (450g) of fresh pasta — enough for 4 servings.
Pasta Roller: Pros and Cons
| Pros | Cons |
|---|---|
| Makes the most popular pasta shapes | Cannot make tubular or shaped pasta |
| Easy to learn — most people succeed on the first try | Process is hands-on: you feed each sheet individually |
| Quick cleanup — wipe rollers with a dry brush | Requires some counter space for the rolling process |
| Multiple thickness settings for different recipes | Long noodles can tangle if not handled carefully |
| Relatively affordable ($80–$150) | — |
Pasta Press (Extruder) Attachment: Shaped Pasta at Home

A pasta press is the attachment that lets you make the kinds of pasta you normally only find dried in boxes — macaroni, rigatoni, bucatini. It's a more specialized tool, and the technique is less forgiving than rolling, but for shaped pasta it's the only option that works with a stand mixer.
How a Pasta Press/Extruder Works
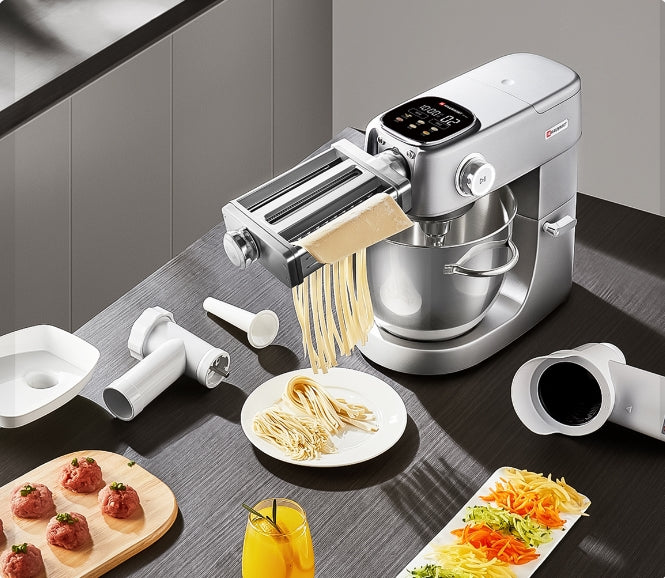
The press mounts to the front hub of your stand mixer. Inside, an auger (a spiral metal shaft) grips the dough and forces it through a removable die — a thick metal disc with shaped holes. As the dough pushes through the holes, it takes on the shape of the die: tubes for macaroni, ridges for rigatoni, spirals for fusilli.
The KitchenAid Pasta Press Attachment (KPEXTA) comes with six dies: large and small macaroni, bucatini, rigatoni, fusilli, and spaghetti. The auger is driven by the mixer's motor, so you add dough at the top and cut the extruded pasta to your desired length at the bottom with the included wire cutter.
Critical difference from the roller: dough for a press must be drier and more crumbly than dough for a roller. If the dough is too wet, it smears instead of holding its shape as it exits the die. This is the main reason the extruder has a steeper learning curve.
What Shapes You Can Make with a Press/Extruder
- Macaroni (large and small) — the classic elbow shape for mac and cheese
- Bucatini — thick spaghetti with a hollow center, ideal for carbonara
- Rigatoni — large ridged tubes for baked pasta dishes
- Fusilli — spiral-shaped pasta that holds sauce in its grooves
- Spaghetti — round strands (a roller can also make these, but the extruder produces a slightly different texture)
The key advantage: these are shapes you simply cannot produce with a roller. If you want homemade macaroni and cheese with actual fresh macaroni — not just broken-up lasagna sheets — a press is the only way.
Quick Recipe: Homemade Macaroni for Baked Mac & Cheese
Ingredients:
- 2 cups (250g) semolina flour
- 1/2 cup (120ml) warm water
- 1/2 tsp salt
Steps:
- In your stand mixer bowl, combine semolina flour and salt. Using the flat beater on speed 2, slowly add water until the mixture resembles coarse sand — it should hold together when squeezed but crumble easily. This is drier than roller dough, and that's intentional.
- Switch to the dough hook. Knead on speed 2 for 2–3 minutes. The dough will look more like wet sand than a smooth ball. That's correct for extruding.
- Break the dough into walnut-sized pieces. This makes it easier to feed into the press.
- Attach the pasta press with the small macaroni die. Set the mixer to speed 6–8 (you need higher speed for the extruder than the roller).
- Drop dough pieces into the hopper one at a time. Use the pusher tool to guide them into the auger. Do not use your fingers or utensils — only the provided pusher.
- As the macaroni exits the die, cut it to about 1 inch lengths using the wire cutter.
- Toss with semolina flour and let dry on a clean towel for 15–30 minutes before cooking.
- Cook in boiling salted water for 3–5 minutes. Fresh extruded pasta takes slightly longer than rolled pasta.
Makes about 3/4 pound (340g) of macaroni — enough for a 9×13 baked mac and cheese.
Pasta Press/Extruder: Pros and Cons
| Pros | Cons |
|---|---|
| Makes tubular and shaped pasta impossible with a roller | Dough must be precisely the right consistency — too wet and shapes deform |
| Less hands-on during extrusion — the mixer does the work | Cleaning is significantly harder — dies must be soaked and scrubbed |
| Authentic pasta shapes elevate dish presentation | Higher speed required, which means more motor strain on smaller mixers |
| Multiple dies included with most models | Each die makes only one shape — no flexibility mid-batch |
| — | More expensive than rollers in most cases ($100–$200) |
Roller vs Press vs Extruder: Side-by-Side Comparison
| Dimension | Pasta Roller | Pasta Press / Extruder |
|---|---|---|
| Pasta shapes | Flat sheets, ribbons: lasagna, fettuccine, tagliatelle, pappardelle, ravioli | Tubular, shaped: macaroni, bucatini, rigatoni, fusilli |
| Dough consistency | Smoother, more elastic (egg-based typical) | Drier, crumblier (semolina + water typical) |
| Thickness control | 8–10 adjustable settings | Fixed by the die — no adjustment |
| Mixer speed | Speed 2–4 | Speed 6–8 (more motor load) |
| Hands-on time | High — you feed each sheet individually | Low — drop dough in and cut at the exit |
| Cleanup time | 2–3 minutes (dry brush only) | 10–15 minutes (disassemble, soak dies) |
| Beginner friendliness | High — forgiving dough consistency | Medium — dough must be exact |
| Typical price | $80–$150 | $100–$200 |
| Best KitchenAid model | KPRA (3-piece roller set) | KPEXTA (6-die press) |
Which One Should You Buy?
Choose based on what you actually want to cook:
- If you want to make fettuccine, lasagna, or ravioli → buy a pasta roller. It's cheaper, easier to learn, and easier to clean.
- If you want to make macaroni, rigatoni, or bucatini → buy a pasta press/extruder. A roller physically cannot make these shapes.
- If you want both flat and shaped pasta → buy a roller first. Add the press later once you're comfortable making dough. The roller gives you more day-to-day versatility, and most home cooks use it far more often than the press.
- If you make pasta less than once a month → consider whether either attachment is worth the investment. A standalone hand-crank pasta roller costs $30–$50 and may be more practical for occasional use.
Which Stand Mixers Work with Pasta Attachments?

Compatibility is the most overlooked part of buying a pasta attachment. Not every attachment fits every mixer — and mixing up hub sizes or drive types can damage your machine.
KitchenAid Hub-Mounted Attachments
KitchenAid makes the widest range of pasta attachments, and they all mount to the front hub port. There are two critical compatibility factors:
- Hub cover type: Most KitchenAid tilt-head models (Artisan, Classic) and bowl-lift models (Professional, Commercial) have a removable hub cover that allows attachment mounting. Some mini models do not have a hub port at all.
- Attachment clearance: The pasta roller (KPRA) is compact and fits all hub-equipped models. The pasta press (KPEXTA) is larger and may not have enough clearance on the KitchenAid Artisan Mini or similar compact models — check the clearance above and in front of the hub before purchasing.
Hauswirt Stand Mixer Compatibility
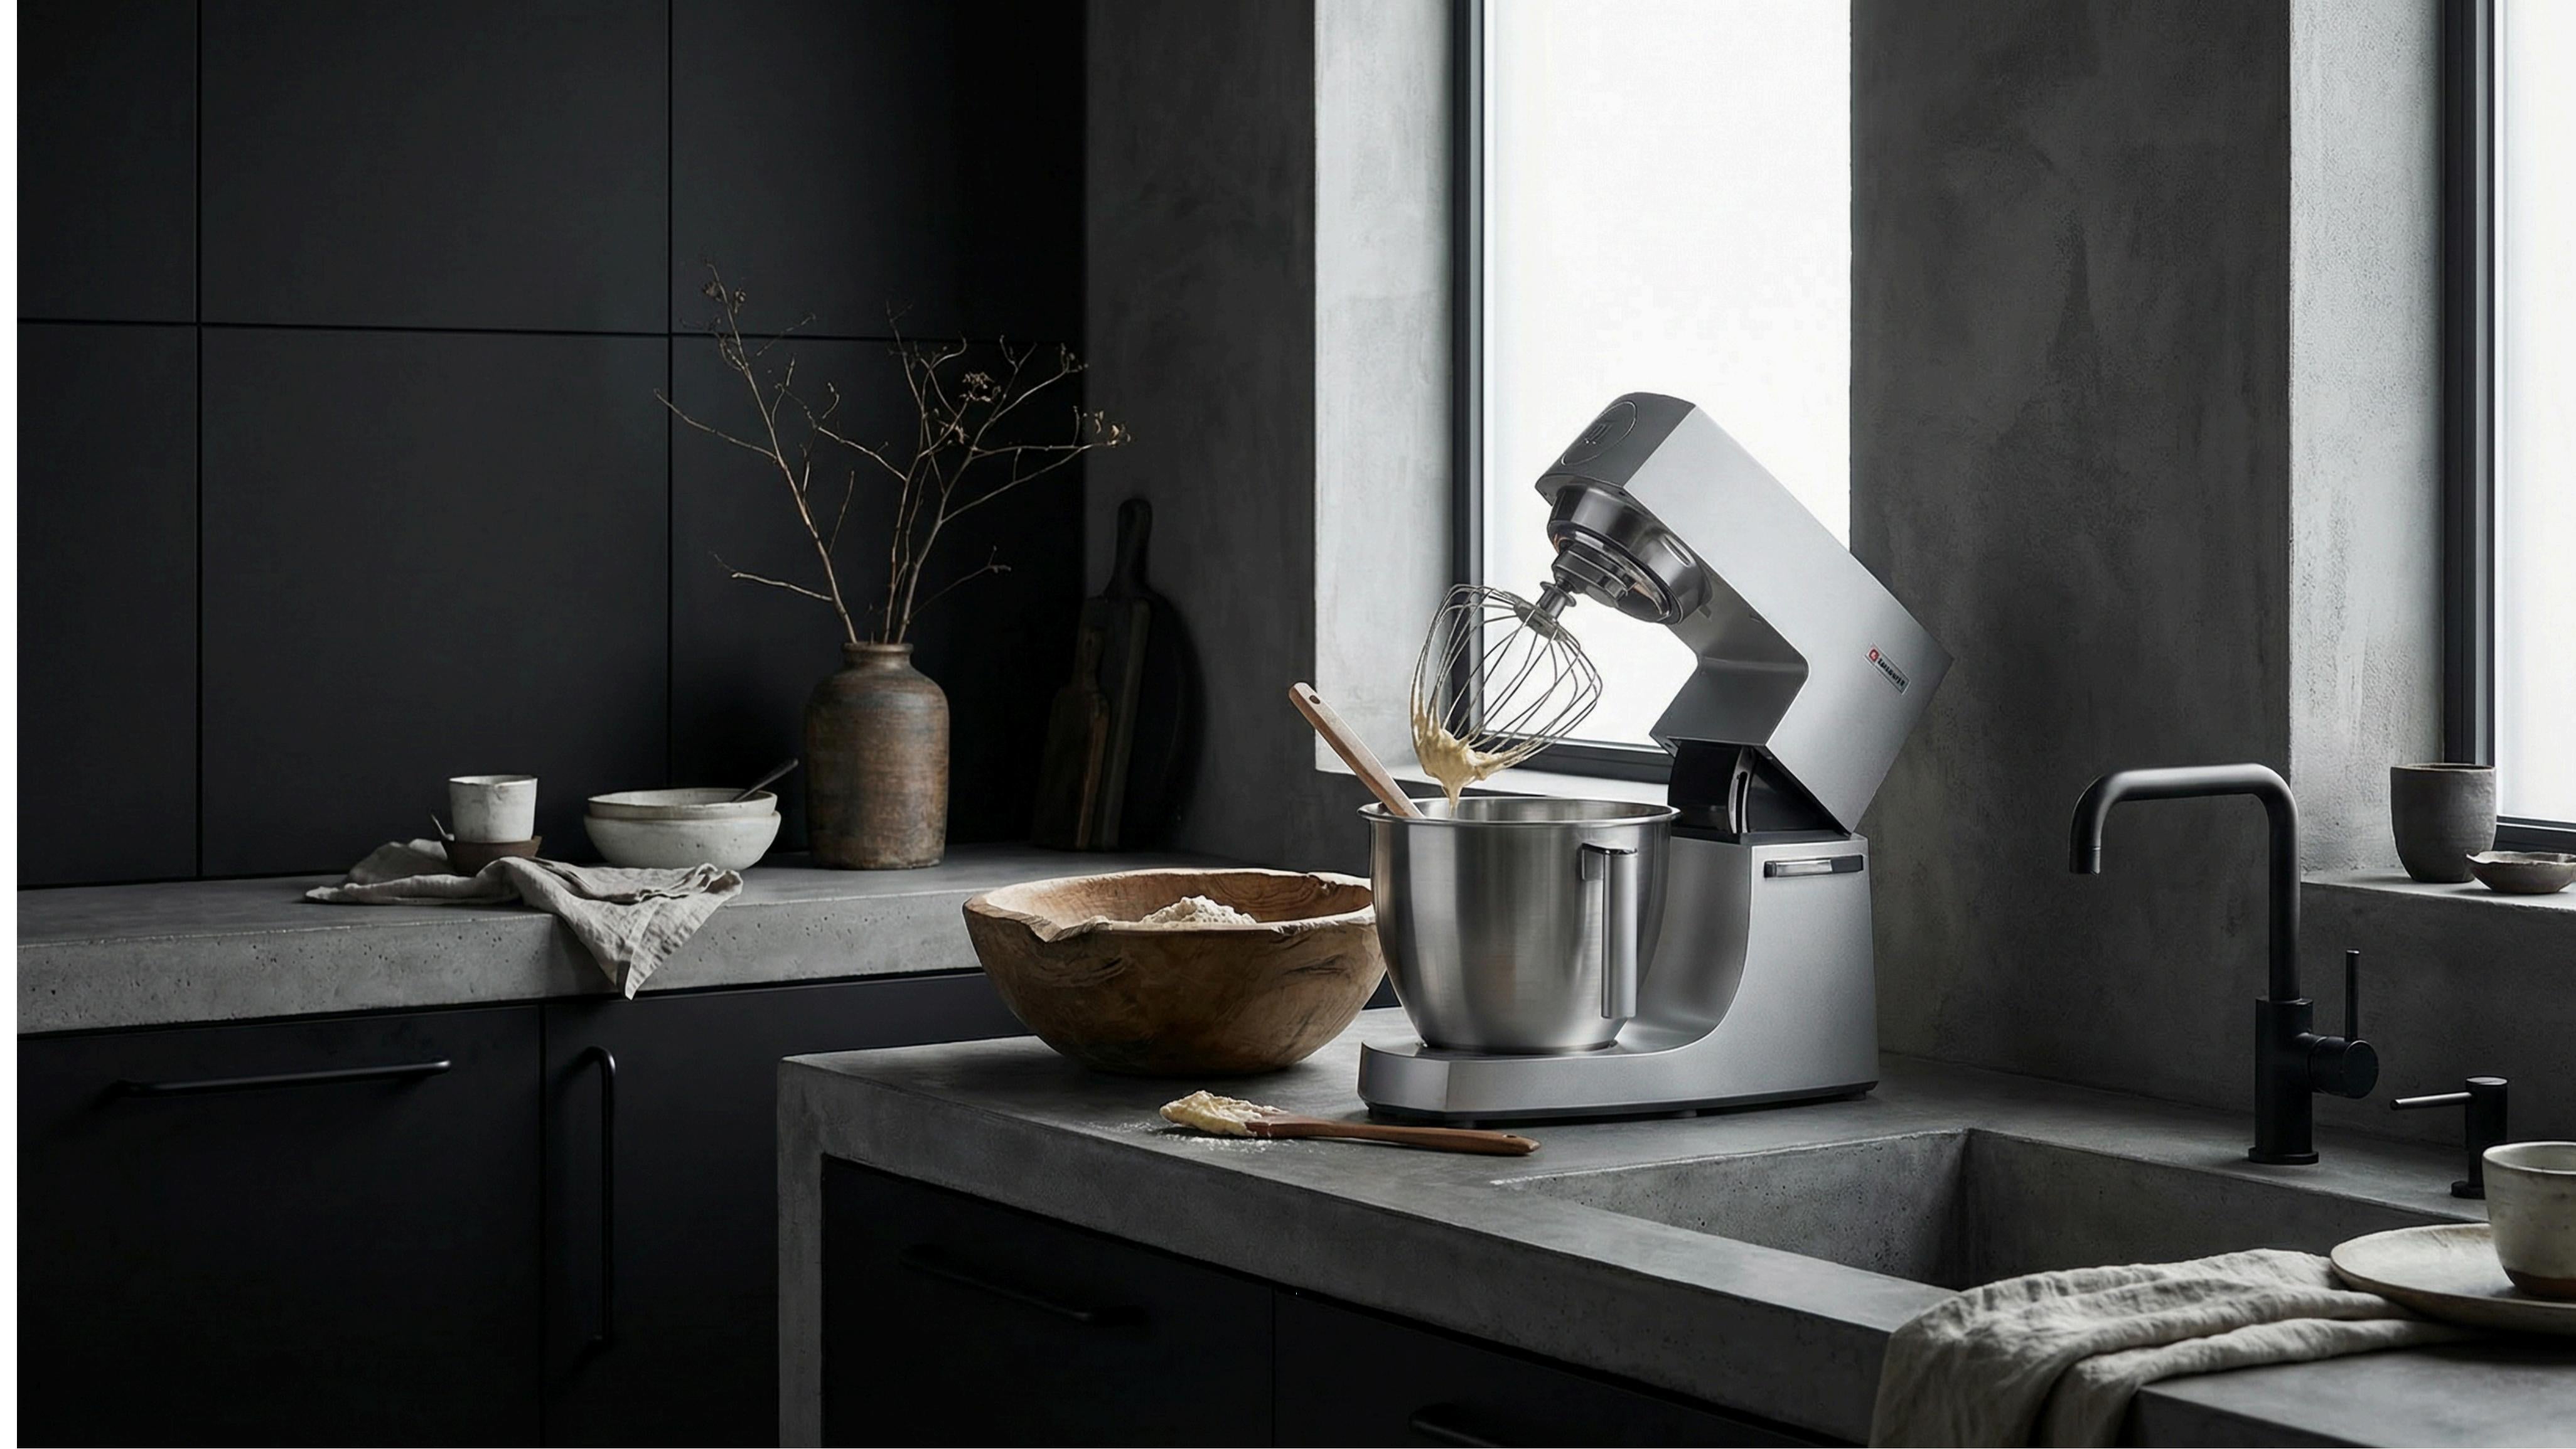
Hauswirt stand mixers like the M5 and M5max feature a front hub port compatible with KitchenAid hub-mounted attachments, including both the pasta roller and pasta press. The Hauswirt M5max has a DC motor that provides consistent torque at the higher speeds required for the pasta press — something AC-motor mixers can struggle with under sustained extrusion loads. For a full breakdown of what each attachment does beyond pasta, see our stand mixer attachments guide.
Other Brands
- Cuisinart: Cuisinart stand mixers (SM-50, SM-70) have a front hub port, but it uses a different size than KitchenAid. Cuisinart sells its own pasta roller and extruder attachments designed for its hub.
- Bosch: Bosch Universal Plus and Bosch MUM Series use a unique drive system. Pasta attachments mount from the top, not the front hub. Bosch's pasta roller is well-regarded but is not interchangeable with KitchenAid or Hauswirt attachments.
- Hamilton Beach, Sunbeam: Most budget stand mixers do not have a hub port at all. You cannot use hub-mounted pasta attachments with these models.
| Mixer Brand | Hub-Mounted Pasta Roller | Hub-Mounted Pasta Press | Notes |
|---|---|---|---|
| KitchenAid (hub-equipped models) | KPRA ($80–$100) | KPEXTA ($100–$130) | Most attachment options available |
| Hauswirt M5 / M5max | Compatible with KA hub attachments | Compatible with KA hub attachments | DC motor handles press speed without strain |
| Cuisinart SM-50 / SM-70 | Cuisinart-branded roller only | Cuisinart-branded extruder only | Different hub size — KA attachments do not fit |
| Bosch Universal Plus | Bosch top-mount roller only | Bosch top-mount extruder only | Top-drive system, not hub-mounted |
| Budget mixers (no hub port) | Not compatible | Not compatible | Use a standalone hand-crank roller instead |
If you're still deciding which stand mixer to buy and pasta-making is a priority, our best stand mixer buying guide covers motor power, hub compatibility, and attachment ecosystems in detail. And if you're choosing between tilt-head and bowl-lift designs, our tilt head vs bowl lift comparison explains how each design affects attachment clearance.
Tips for Making Pasta with Your Stand Mixer
Whether you're using a roller or a press, the dough makes or breaks the result. Here are the four factors that matter most.
Dough Consistency Is Everything
For roller pasta, the dough should feel like firm Play-Doh — smooth, elastic, and slightly tacky but not sticky. When you press your finger into it, the dough should spring back slowly.
For press/extruder pasta, the dough should be noticeably drier — more like coarse sand that clumps when squeezed. If the dough is too wet for the extruder, the pasta will smear and lose its shape as it exits the die. Add semolina flour 1 tablespoon at a time until the texture is right.
The simplest test: pinch a small piece of dough. If it holds together without crumbling, it's ready. If it falls apart, add a few drops of water. If it sticks to your fingers, add flour.
Don't Skip the Resting Time
After kneading, wrap the dough in plastic and let it rest at room temperature for at least 15 minutes (30 is better). Resting relaxes the gluten network, which makes the dough easier to roll and less likely to shrink back or tear. Skipping this step is the most common beginner mistake — and the one that makes rolling feel like a wrestling match.
Flour Types Matter
00 flour (finely milled Italian flour with moderate protein) produces the silkiest, most tender pasta. It's what Italian home cooks use for egg-based fresh pasta.
All-purpose flour works well for rollers and is available in every grocery store. The texture is slightly chewier than 00 flour, but most people won't notice the difference.
Semolina flour (coarsely milled durum wheat) is the standard for extruded pasta. Its higher protein content and gritty texture help the pasta hold its shape as it pushes through the die. Most press recipes use semolina and water, not eggs.
Speed Settings for Pasta Dough
Mixing and kneading the dough: use speed 2. This is slow enough to develop gluten without overworking the motor. Running the pasta roller: speed 2–4. Higher speeds stretch the dough too fast and can cause tearing. Running the pasta press/extruder: speed 6–8. The auger needs higher speed to push the stiff semolina dough through the die. If your mixer has a DC motor, it will maintain consistent torque at these higher speeds without bogging down — an advantage that becomes noticeable during long extrusion runs.
Cleaning and Maintaining Your Pasta Attachment
Cleaning is the part most guides skip — and the reason some people stop using their pasta attachment after the first month. Here's how to make it manageable.
Cleaning a Pasta Roller
- Never wash with water. Moisture causes the rollers to rust. Instead, use a dry pastry brush or the cleaning brush that comes with the attachment to sweep away flour and dough bits.
- Run a small piece of dough through at the end of your session to pick up any residue inside the rollers, then discard that piece.
- For stubborn bits, use a dry wooden toothpick — never metal, which can scratch the chrome finish.
- Store in the original box or a cloth bag to keep dust out. The rollers are chrome-plated and fairly durable if kept dry.
Total cleanup time: 2–3 minutes.
Cleaning a Pasta Press / Extruder
- Disassemble completely. Remove the die, the auger, the ring, and the pusher. Each piece needs separate cleaning.
- Let the die dry overnight before cleaning. Trying to clean a wet die is frustrating — the dough smears. Once dry, use a toothpick or the included cleaning tool to push dried dough out of the holes from the back.
- The auger and housing can be wiped with a dry cloth, then a damp cloth if needed. Dry immediately.
- Never submerge the press body in water — it contains the drive mechanism that connects to your mixer.
- Some cooks soak the dies in warm water for stubborn residue, then dry thoroughly in a 200°F oven for 10 minutes to prevent rust. This is a last resort, not a regular practice.
Total cleanup time: 10–15 minutes, plus overnight drying if you need to soak a die.
The cleaning difference is real. If you're someone who avoids recipes with "lots of cleanup," the roller is the better choice. The press rewards people who don't mind a bit of disassembly in exchange for shaped pasta.
Is a Pasta Attachment Worth It?
This depends on how often you cook pasta and what kind of pasta you want to make. Here's an honest breakdown.
Cost Comparison
| Option | Upfront Cost | Cost per Batch (4 servings) | Pasta Quality |
|---|---|---|---|
| Dried boxed pasta | $0 | $1.50–$2.50 | Good — consistent, convenient |
| Standalone hand-crank roller | $30–$50 | $0.80–$1.20 (flour + eggs) | Very good — fresh, tender texture |
| Stand mixer pasta roller attachment | $80–$150 | $0.80–$1.20 (flour + eggs) | Very good — same quality, less manual effort |
| Stand mixer pasta press/extruder | $100–$200 | $0.60–$1.00 (semolina + water) | Excellent — shaped pasta you can't buy fresh |
When It's Worth It
- You cook pasta at home more than twice a month
- You enjoy the process of making food from scratch
- You have dietary restrictions and need to control ingredients (gluten-free, egg-free)
- You want fresh pasta for dinner parties or special occasions
- You already own a hub-equipped stand mixer
When It's Not Worth It
- You make pasta less than once a month — the attachment will gather dust
- You only want fettuccine occasionally — a $30 hand-crank roller is more practical
- You don't own a stand mixer with a hub port — buying a mixer just for pasta doesn't make financial sense
- You dislike cleanup — especially relevant for the press/extruder
The bottom line: if you already have a compatible stand mixer and you cook pasta regularly, the roller attachment is one of the highest-value add-ons you can buy. The press is more niche — worth it if you specifically want shaped pasta, but a harder sell for casual cooks.
Frequently Asked Questions
Can I make gluten-free pasta with a stand mixer attachment?
Yes, but the technique needs adjustment. Gluten-free flour lacks the elasticity that wheat gluten provides, so the dough is more fragile. For roller pasta, add 1 tsp of xanthan gum per cup of gluten-free flour to help bind the dough. Roll on slightly thicker settings (don't go thinner than setting 4) and handle the sheets gently. For extruded pasta, gluten-free semolina blends exist, but the dough must be very precisely hydrated — start with a recipe specifically designed for your flour blend. King Arthur Measure for Measure and Caputo Fiore Glut are two brands that work reasonably well for fresh pasta.
What's the difference between a pasta roller and a pasta maker?
A pasta maker is a standalone countertop device (hand-crank or motorized) that rolls and cuts dough — it does the same job as a stand mixer pasta roller attachment, but without needing a stand mixer. A pasta roller specifically refers to the attachment that connects to your stand mixer's hub port. They produce the same types of pasta. The main differences are price (standalone: $30–$50; stand mixer attachment: $80–$150), convenience (the attachment saves counter space and uses the mixer's motor), and whether you already own a compatible mixer.
Do I need a stand mixer to make homemade pasta?
No. You can mix and knead pasta dough by hand, and roll it with a standalone hand-crank pasta maker ($30–$50) or even a rolling pin. The stand mixer saves time on kneading and provides motorized rolling, but it's not required. Many Italian home cooks make fresh pasta daily with nothing more than a wooden board, a rolling pin, and their hands. The stand mixer makes the process faster and less physically demanding — not possible.
How long does homemade pasta take to make with a stand mixer?
From measuring flour to finished noodles: about 20–25 minutes for a roller, 25–30 minutes for a press. Here's the breakdown: mixing and kneading (5 minutes), resting (15–30 minutes — you can prep your sauce during this time), rolling or extruding (5–10 minutes). The resting period is passive time, not active work. Cooking fresh pasta takes only 2–3 minutes in boiling water, compared to 10–12 minutes for dried pasta.
Which pasta attachment is best for beginners?
The pasta roller. It's more forgiving with dough consistency, easier to clean, and produces the pasta shapes most beginners want to make (fettuccine, lasagna, spaghetti). The roller also gives you immediate visual feedback — you can see the dough getting thinner with each pass, which helps you develop a feel for the right consistency. Start with the roller, and add the press later if you find yourself wanting shaped pasta.
Can I use KitchenAid pasta attachments on other stand mixers?
It depends on the hub size. KitchenAid pasta attachments fit Hauswirt M5 and M5max models, which share the same hub dimensions. They do not fit Cuisinart mixers (different hub diameter), Bosch mixers (top-drive system, no front hub), or most budget mixers (no hub port at all). Always check your mixer's manual for "power hub attachment compatibility" before purchasing. If your mixer doesn't have a compatible hub, a standalone pasta roller is a better investment.
How much dough can a stand mixer pasta attachment handle at once?
Most home-size stand mixer pasta attachments work best with 1/2 to 1 pound of dough per batch (about 250–450g of flour). For a roller, you'll process this in 4 pieces, feeding one at a time. For a press, you'll add dough pieces gradually into the hopper. If you try to make more than 1 pound at once, the dough dries out before you finish processing it. For larger quantities, make multiple smaller batches — the results will be better than one oversized batch.
What to Do Next
If you already own a stand mixer and want to explore more than just pasta, our complete stand mixer attachments guide covers every attachment type — what each one does, when to use it, and which ones are worth the money.
If you're still choosing a mixer, our stand mixer buying guide breaks down the options by budget, motor type, and attachment ecosystem. And if the tilt-head vs bowl-lift decision is holding you up, our comparison guide explains how each design affects your attachment options.
Ready to start making pasta? The Hauswirt M5max comes with a hub port compatible with both pasta roller and press attachments, and its DC motor handles the sustained higher speeds that extruding demands.
Sources
- KitchenAid. "Pasta Roller Set KPRA." KitchenAid.com.
- KitchenAid. "Pasta Press Attachment KPEXTA." KitchenAid.com.
- King Arthur Baking. "Tips for Making Fresh Pasta." KingArthurBaking.com.
- America's Test Kitchen. "Pasta Makers: Which Ones Are Worth Buying?" AmericasTestKitchen.com.
- Serious Eats. "The Food Lab's Complete Guide to Fresh Pasta." SeriousEats.com.
- University of Illinois Extension. "All About Pasta: Fresh vs. Dried." WebExtension.illinois.edu.